How to Cut a Short Bob Haircut | Popular Haircut Tutorial with Easy Cutting Techniques
Posted in Videos on December 9, 2020
This is a tutorial that will show you how to cut a short bob haircut. It's an easy to follow guide with full hair cutting steps and detailed instructions. I discuss how to cut the perimeter, start the layers, and create a cute side bang.
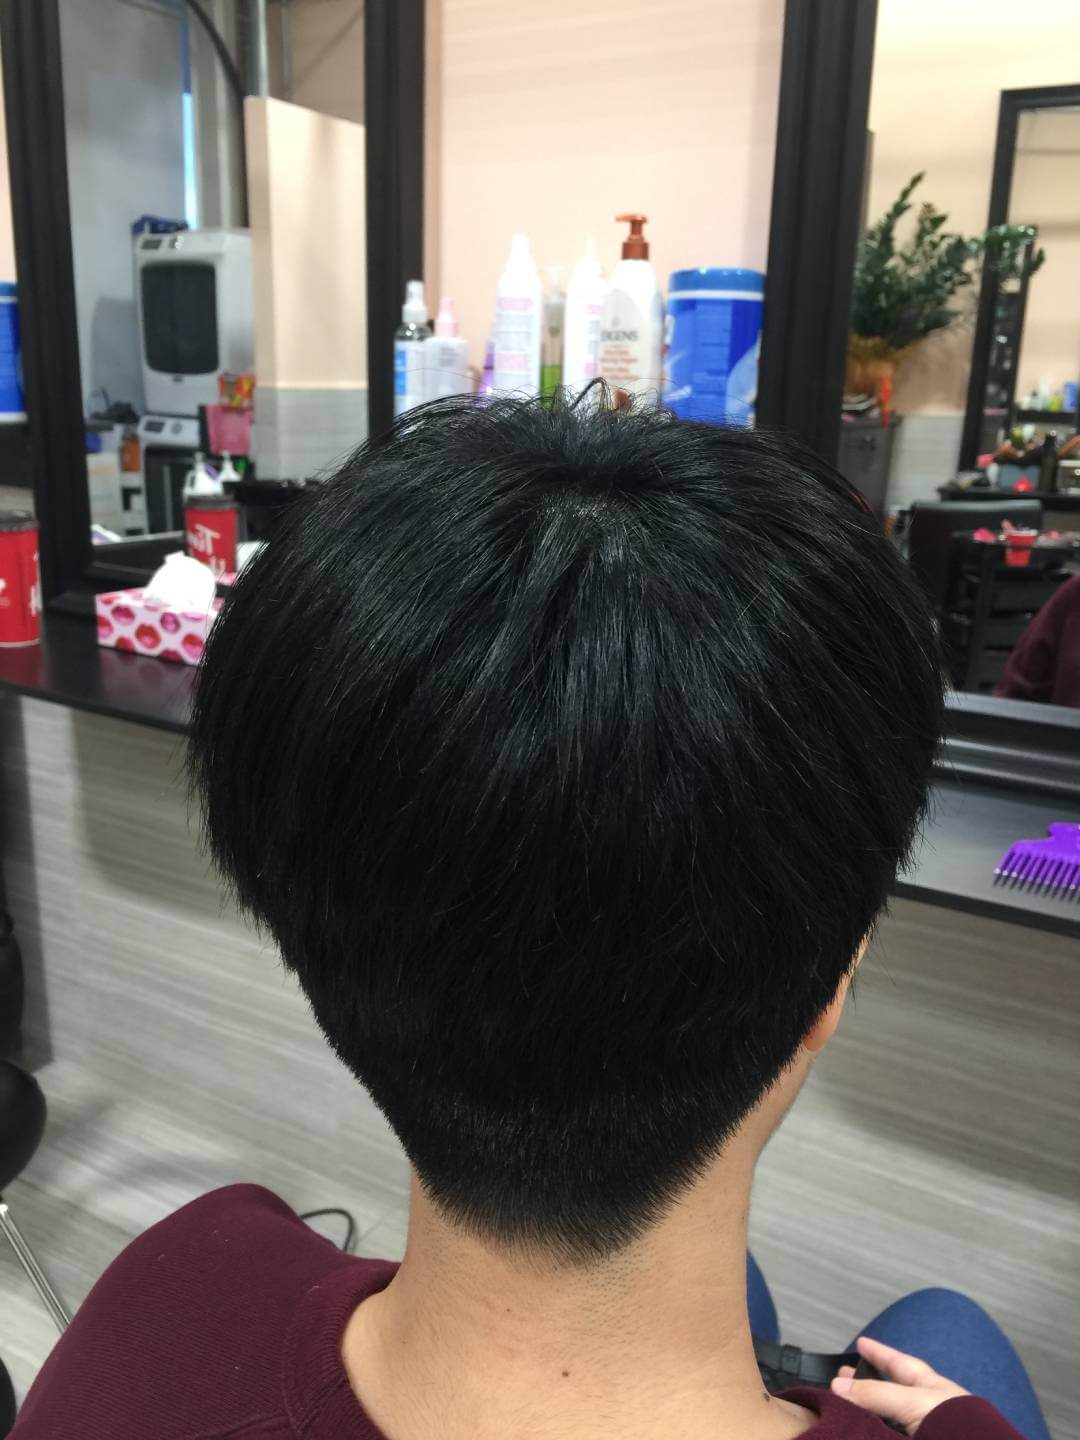
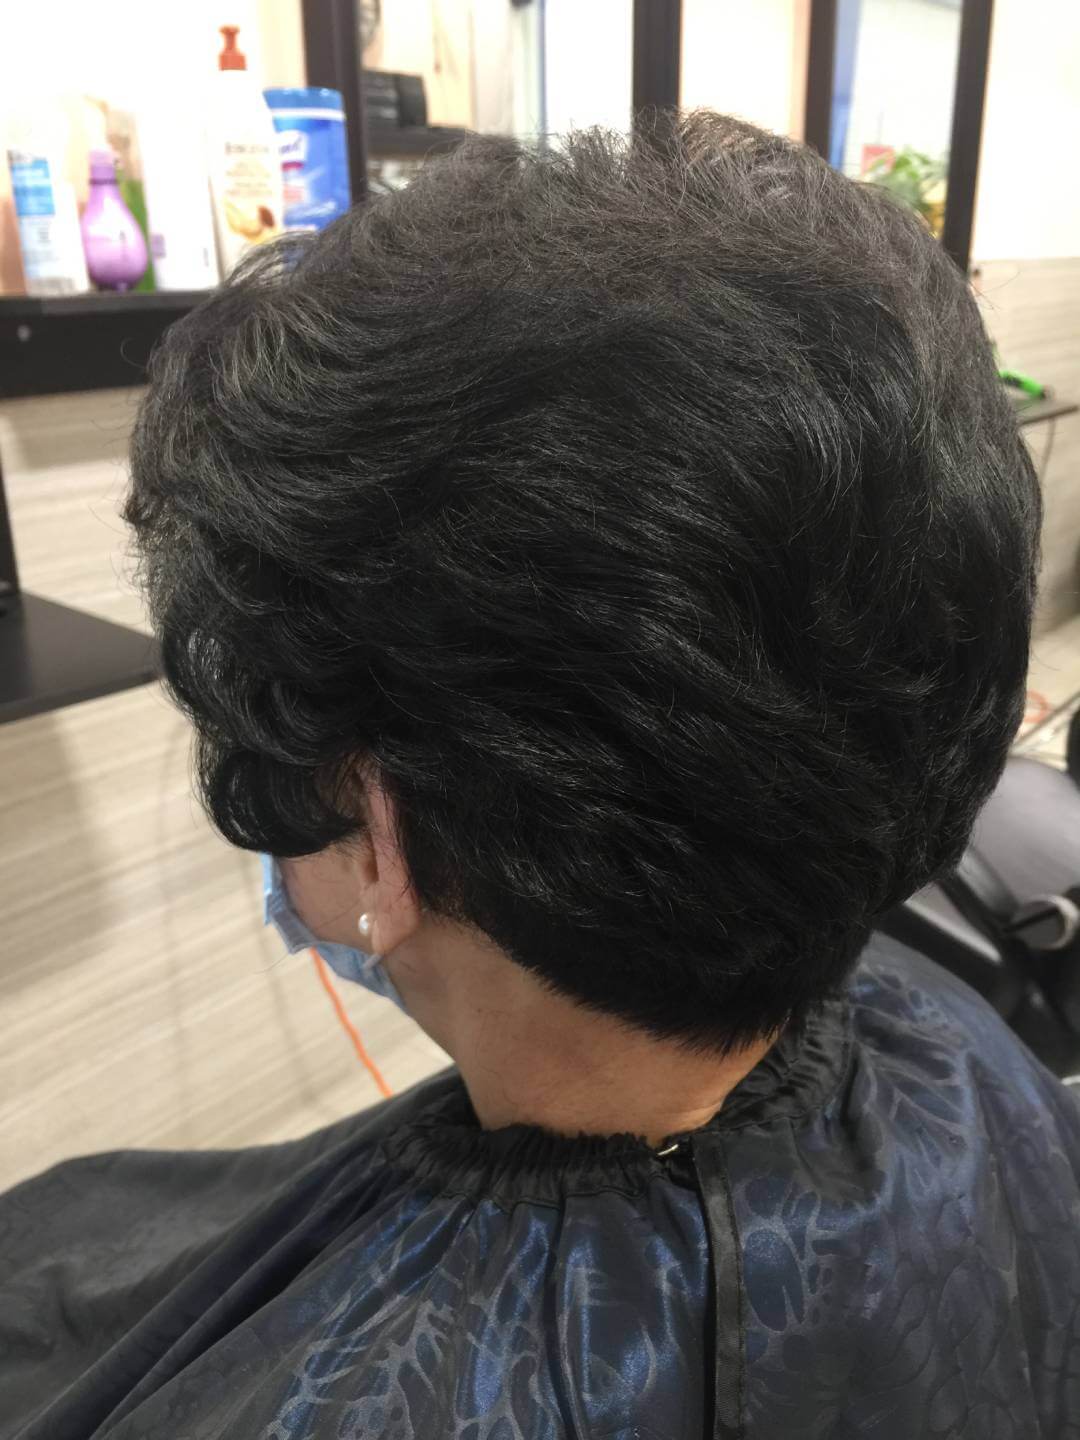
what's up welcome to my youtube channel in today's video we're going to be doing a haircut I know so many of you guys asked for haircuts so I'm gonna be showing you guys a haircut and how to do a bob haircut this is a great classic haircut especially a little modern twist so I'm going to show you guys exactly how to do that let's go alright I'm really excited to do this video today because so many of you have asked me to do some regular haircuts I know a lot of times you want to see sometimes a really fancy stuff but then you also want to know how to do those regular standard haircuts but you have people coming in asking for all the time so I have my mom again we're bringing her back and I'm gonna do her bob haircut this is a really simple haircut and it's a really great technique that you can use on a lot of your clients and chances are you probably have a lot of ladies asking for this haircut already so let's get started [Music] all right so where did you start out her haircut and I'm actually gonna first start off by parting it at where she naturally hurts it so I would like to comb all the way back and then I kind of pushed forward you guys can see how I do that you probably do that with your clients and I kind of see where her hair naturally parts so we can see kind of falls right in there she does have a really strong cowlick right here so I know that that's a pretty good area in order to find her part so then from there we're gonna comb it all the way it straight down clean that up a little bit since I grabbed it so we're coming all the way straight down and just part it off from there and I'm what I'm going to do is I'm going to find kind of for apex is about right here you guys can kind of see that right about there and I'm gonna take the line from here and I'm going to dry draw a line all the way down to the back behind your ear now one thing you can do to make your sectioning a little bit easier is what you want to do is you want to connect your comb down to your finger so I'm gonna kind of place my finger and this starts to just come naturally over time but kind of right behind her ear find my apex draw that line and now I can easily comb that section that's really nice and clean so I'm not going to put this away I'm just going to kind of twist it out of the way and then do the same thing on the other side so now that I have the front from the back and the two quadrants I'm going to find my place where I left off for part kind of that apex and again she does have a slight bit of a cowlick so this is a really great way to figure out where their hair kind of needs to part I usually do a little bit of a diagonal back depending on where their parting is so it's not like straight back over here so I'll do a little bit diagonal back you guys can see it kind of goes into that whirl a little bit so again I'm going to find kind of the middle of her neck with my finger and I'm gonna draw and connect the dots so we're gonna go just straight down here we're gonna just split it into two quadrants and then from here what I'm gonna do is I'm going to find her occipital bone right about there and I'm going to connect from her occipital bone to about the middle of her mastoid process bone so I'm going to do it on this side that I'll show you guys on the other side here and you can always kind of connecting my fingers we're going to clip the up out of the way so now I've got my connecting point here this is right about the occipital and it could be a little bit lower you guys can kind of see that occipital bone in one way that you can do and find the occipital bone I learned this trick from Travis Parker but you can kind of see where her hair her head starts to round off you guys can see here's kind of my comb is on that flat plane and here's the other flat plane you can kind of see right there where it's not touching either so that's kind of right there so rocks a little bone is slightly a little bit lower but I'm happy with that and then this is her mastoid process but right behind her here and so I'm gonna find kind of a middle point in there and again find my finger and just connect the dots and this just makes sectioning so easy and really clean and not having to go back and clean things up and we'll just clip that out of the way so you guys can see I have my two diagonal back sections going straight down alright so now what I'm gonna do is I'm going on my client but what's down and tilt their head down and then I'm gonna comb all of this section all the way straight down and gonna go in with my shears and today we're gonna be taking off about three quarters of an inch so I like to especially on clients where we are going to be cutting kind of right on that neckline I like to go through and I use the thin tooth comb our thin tooth side of my comb and I just kind of comb this down here and I go right in and I don't even have any elevations in the hair and we just cut along this and I am going to do a little bit slightly rounded a little bit longer towards the corners I'm actually following the lines of where she has had her hair cut before so same thing I'm just kind of pivoting my body all the way around same thing on this side and I like to cut this at zero elevation like I said without holding it in between my fingers just cutting it right on that skin since I don't even go back in you can see how they use a little tiny baby here so she is peeking out and I always kind of check make sure to check the links on both sides good and now I'm going to take about an inch section from there and continue up this section until we've completely finished the back and sometimes when they get to this corner because it is now we're kind of elevating out just a little bit I do always hold it t to the partying or just straight out I'm not pivoting with her body I'm actually over directing it straight back to kind of maintain some of that length so sometimes on these corners after that first section that will do that there you guys can see all the rest of them I am still cutting straight on straight on the party come down or natural fall and then also putting straight on okay so now that I finish the entire back section everything was cut to pretty much zero degrees except for you can say that I did over direct these back straight so now I'm going to go to the side and I personally just like to split the side right in half just straight down nothing too complicated there and so I'm going to take my fine-tune side of my comb comb it all down and I'm just going to cut her also again kind of a natural fall and one thing you do want to be careful if you guys can see there is a little bit more length here I always do kind of angle a little bit so it's a little bit longer in the front just slightly shorter in the back nothing dramatic we're not doing you know posh spice here where it's crazy long but we also don't want to do it so that it starts to creep up and as it dries it gets shorter in the front I definitely don't want that that's typically not the most flattering angle on most clients so what we're going to do is we're going to comb it down straight down and one thing that you do want to remind yourself of is there is an ear here so sometimes you can just loosen that tension just a little bit here and I'm just gonna connect the dots here because I do her hair quite often I know pretty much about how much I'm taking off at all times but as you need to know your clients you'll kind of start to know that stuff where they kind of prefer their legs to sit so for her I'm not asking her okay is it okay if I take up this much but that would be something definitely you want to discuss in the consultation [Music] well we're gonna do the same thing on the other side exactly the same so once I cut both sides I always like to double check in the mirror to make sure that you know everything is laying exactly you can also stand in front of the client and do that but for me I think just looking in the mirror it is perfect so both of those sides look even if something was a little bit off you just want to go back and double-check but you didn't elevate or anything like that so now that we've checked all of our perimeter we're gonna go into cutting our layers alright so now what I'm going to do is I've combed everything out I've taken out all my sections I'm going to take just a party right here down through the back the middle of the back and this is gonna be kind of where I set my guideline so I'm going to comb this out you guys can see I don't like section it all out and clip it away I'm kind of more freeform cutter so I'm okay if it's not exactly perfect but I'm going to hold this up at a 45 degree angle and all I'm going to do is I'm going to kind of barely take off some of that little bit of that corner there and then I'm going to take that exact same section and I'm going to fold it down eh I believe this is a low 45 if I'm wrong correct me in the comments again you guys know I'm not a very technical hair cutter so there we go so we've got our high 45 we cut off that corner same thing below 45 now what I'm going to do is I'm literally going to take this and this is gonna be my traveling guide so I'm just going to take pivoting radials and I'm going to travel with the guide meaning I took my guide here and then I'm gonna split that in half and I'm gonna go from this here vs. over directing it back towards the free base section so I'm going to just take this and the only time that I'm going to over direct a little bit back is when I get kind of right here just behind the ear because I want to make sure that we're maintaining some of this weight behind the ear and we don't end up with a hole so we're going to pivot with this again same thing about 45 and you'll notice that some of the hair drops out because it doesn't need to it's at this point too short and they're going to take our low angle here and just so you guys know a lot of people ask me like how much do you take off again this is a haircut that I do on her all the time so her hair had grown about three-quarters of an inch since we've cut it last so that's how much I'm taking off if you guys ever wonder how much do I take off from last time typically hair grows about half an inch a month and I looked at her roots for her color to determine how much we needed to cut off to maintain that kind of haircut so definitely do something a little trick that I use when you kind of forget how long it's been or clients say do the same thing you're like shoot you just follow the lines of what you did last time and now we're getting to that little section right behind the ear here so I am gonna over direct all of these back just slightly here I actually do kind of over direct this one quite a bit back these ones up front here I'm actually not going to do the low 45 I'm just gonna do the high one kind of more face framing but we will want to make sure that we get it into the layers and then we're gonna literally do the same thing going through the other side now sometimes people like just change their body and I personally have always just stood on the same side as my client you do want to be careful because when you are over directing for instance on this side you're pulling it away from your body but when you're over directing or over directing back on this side you're pulling it towards your body so you just want to make sure that if you are doing it 45 you're doing a low 45 you just want to make sure that you're aware of what your body is doing and that you're not doing something where you're over directing more on one side one way you can tell if that's happening to you is if one side ends up a lot heavier with layers or one side ends up with a lot shorter layers it's usually because your body was over directing something or not doing a true forty-five or you're pulling it closer to your body so just be really aware of that and sometimes that happens sometimes you need to go back and double-check and sometimes you might need to take out just a little bit more weight in that area and just be really aware of your body so now we're going to continue on I'm going to keep doing this section and you guys can watch long [Music] all right so now that we finished up all of our layers I do like to take one other section and just kind of clean it up a little bit so I always kind of take a straighter cross section here again maybe more freeform I'm not gonna like part it all out I just kind of do it with my fingers here but I'm looking off her part line so I'm going to go fold it up straight up to the part and I will kind of just clean that up just a little bit and you will tend to see a little bit more of a V you won't really on this one because it's not it's gonna be crazy D but you might see a slight bit of one based off of her part so now that we've done all that I'm going to dry her and then we're going to finish the cut dry [Music] all right we just finished our blow-dry I haven't even gone in with anything you happy you guys can already to see she's getting some nice lifts in there so what I'm going to do is I'm going to literally follow the same sections that I had done before and you guys can see we've got a lot of weight kind of build up in here and you guys can see I did do point cutting when I did cut into it but now what I want to do is I want to do some more deep point cutting and a little bit more just kind of break up that texture so now you guys can see a lot more texture in there and I actually will do the same thing about 45 and then a low 45 just to also kind of break that up and get rid of a lot of weight she does hold a lot of weight in her hair and her hair tends to be pretty flat so you definitely want to give her a little bit of texture and kind of break that up so I'm gonna go through our same pattern and just kind of do that deep should come a jagged II point cutting whatever you want to call it and then just keep going on there another reason why I like doing it this way too is it allows me to kind of go back in and check my haircut also so you guys can see there's actually a little bit of length that I left in here must have been something that it over directed and so hey that happens to all of us I'm gonna just go through and just kinda clean that up ever so slightly but it allows me to go back in and check my haircut so that's something that's really helpful especially when you're first kind of getting started you might be a little bit nervous like who did I miss a section or something heavy or why is it heavy just go back through and kind of go back through your sectioning and check hey did i over direct something or is this a little heavier long in one area and my doing it as you're texturizing it allows you to not feel like awkward in front of the client where you're just like combing through their hair that allows you to kind of kill two birds in one stone so her hair is definitely a little bit finer up here kind of in front of her ears so I don't really have a ton of texturizing to do back there it's mortise in this back section so I'm going to just keep going around the head and I'm gonna show you guys what we're going to do next all right so you guys can see her layers are really they're really nice thing because we over directed you guys can see it's kind of a little bit longer kind of hugging this end I still feel like there's a little bit of weight in here she definitely holds a lot of weight down in this bottom section so what I'm going to do is I'm actually just gonna kind of take that same section that I did for our haircut when we started it kind of clip this out of the way again it doesn't need to be anything perfect I'm gonna go in with my thinning shears and just have just a slight bit more texture down here you totally could go in with point cutting I personally dislike thinning shears because it allows me to kind of get in a little bit deeper so I'm just going to do kind of a low 45 and instead of going straight in and just cutting this out I don't really like seeing a lot of these short pieces in there so I'm just going to kind of notch it out right here you guys could kind of see that I'm just barely getting in there and that allows it to have a bit more texture again so it's not just like a chunk of short hair it's almost kind of slide cutting with our thinning shears and it allows you to not have any lines or anything especially because a lot of times clients down here she's got a cowlick down here we don't want to add to that we don't want to make it more difficult for her so just kind of slide cutting and getting just a little bit more of that weight out down here I like doing it with thinning shears you totally again could do it with regular shears to me I just really like how this looks a little bit easier a little bit less complicated so I'm going to do that just to finish off this little bottom section here all right one more texturizing technique I am gonna do because again for her she has this really kind of flat limp hair that doesn't want to do much I want to add a little bit more internal texture just to hopefully give her a little bit more volume so pretty much everything behind the ears I am gonna go back in same sectioning like I have been doing and I'm gonna do the same thing that same kind of splice cutting now I will keep it about two and a half inches away from the root so we don't want to go too close to the root because otherwise you could get some like funky calyx and stuff but just kind of adding in a little bit of internal texturizing and again using these thinning shears I really like them and it works with the well alright so I'm gonna do her face framing and I just like to just barely add a little bit of face training for her so I'm just going to kind of hold this down and just do a little bit of slide cutting here nothing too crazy she doesn't need a huge bang piece but she does like a little bit of face for me and just a little bit to top this around her face so we'll kind of connect this in there it kind of just gives her this nice little bang piece right there and sometimes I will even take this up and just a slight bit of texture right here she doesn't really need it it's pretty thin so just kind of right there we'll do the same thing on the other side [Music] all right I'm really good about this but just to kind of clean up her hairline go ahead and look down for me so what I like to do is I like to go in with my shears and just make sure that I cleaned up every little thing that everything's laying really nicely so I'll just kind of go through right here and one thing you can do too is you guys can see it's kind of solid in there you can go through and clean it up with your shears but then if you don't really like how solid that is you can take your thinning shears kind of lift it up here you guys can see here and you can either notch into it like this or you could go straight across and I just kind of softens that line just a little bit there just a little bit here so we're so slightly and then what I like to do is you guys you should one of these hairs underneath here those are going to like neck hairs so I'm going with my trimmers and I did try to clean up that line [Music] so even though female clients I still have a fairness for this reason especially when it comes to your Bob clients they've got a little neck hair sometimes really didn't look too that it is kind of clean up these little guys and I'm here create a stronger line get rid of that peach fuzz that a lot of us have this is great especially if you're doing Dixie clients or just plain to have fun the shorter bottom all right and here is our final result of our haircut you guys can see how beautiful and stacked it looks and just the fun layers that we got in there we got some definitely some great movement in there and it's gonna just be a really fun haircut it grows out so nicely and your clients are gonna love it alright guys I hope you enjoyed this video and again I would love if you would hit the subscribe button and make sure to turn on the little bell for notifications because I want to make sure that you don't miss out on any videos like this also if you guys want to check out the color that he did on my mom's hair you guys can check out that video below I linked it there as well and I just want to say thanks for watching this video I hope you enjoyed it and if you haven't already come over to Instagram and said hi please come over send me a DM let me know that you watch these videos and they'd love to hear from you as always thank you so much for taking the time to watch these videos I'll see you guys next time [Music] [Applause] [Music]